大家好~ 我是NiX!!
欢迎来到MH新单元~ ‘我知我讲‘#01
开始之前我不敢说这是教程~纯属个人制作手办的经验和心得而已~
望各位“高手”高抬贵手~ 强X我讲的东西也请手下留情!!!!
首先我就讲下基本的制作概念~
这是我的制作方法~ 顺序为 :点件/读注意事项, 去除水口, 预组/打桩,打磨/修补,洗件,上水补土,检查后再上水补土,上色,上水贴,组装(✅完成)
每一个步骤都有它的方式,我会在每个post写上细节。
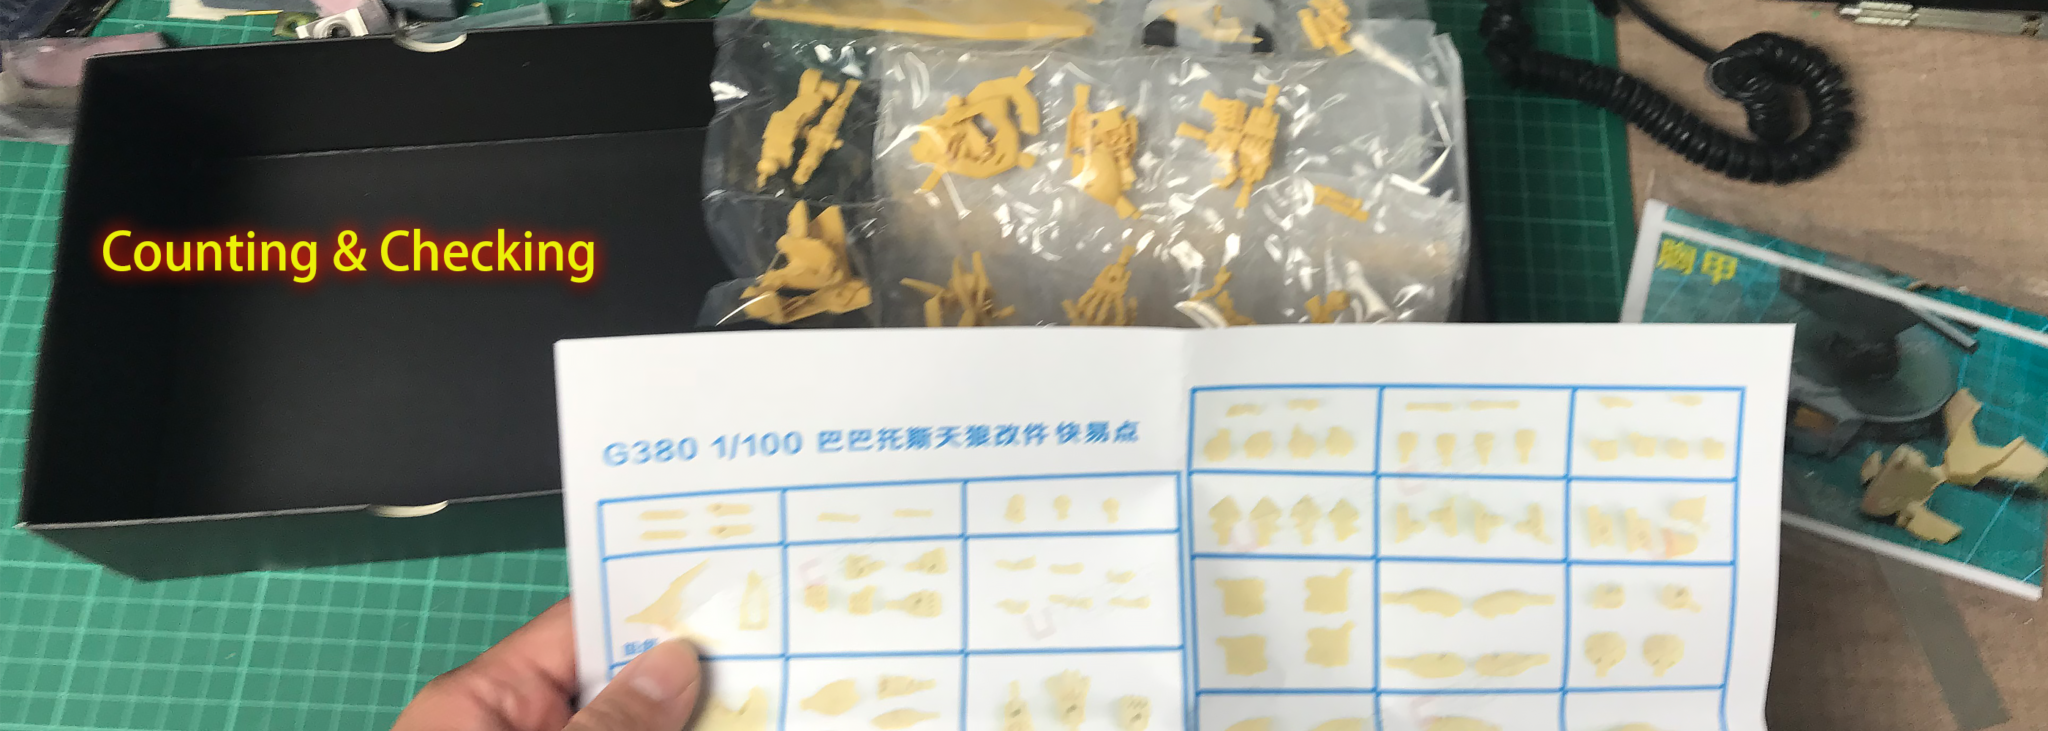
第一步: 收到后的第一步骤永远都是“点件”!!
收到后的第一步骤永远都是“点件”!!
收到后的第一步骤永远都是“点件”!!
因为我相信很多朋友玩塑料拼装模型应该都没检查里面的吧~ 买了就丢到一旁等制作!(其实在反映我自己)为什么这样呢? 因为都是对厂商的产品有一定的信心~ 相信自己不会遇到问题的。
但是在用在手办这种模型中,有这观念绝对会让你吃亏的~ 因为每个商家都有一定的条律,例如:购买后或收到后的日期内属于保固期~ 在这几天内如果你的套件在拆开包装之前,如果点件的时候发现少了或零件损坏,你可以在有限的日期内联络客服。这样客服会为你安排replacement~零收费!!
如果过了期限,怎么办?这样我的手办不就报废了??
没关系的,最多就是自己付钱和付邮费购买replacement而已~希望大家别忘记点件咯~
第二步 :切割水口
这才是本篇要讲的事,由于树脂材质比起塑料来的硬,而且不易切割~ 所以有几个选择来移除水口!
第一种:我个人比较推荐的就是使用#锯子~ 而且是模型锯子,刀身偏薄那种~ 而且不是田宮那种过于薄的74094蚀刻锯(这用来切割塑料就差不多,树脂的话就…………..)。为什么不能买五金的锯子呢? 因为五金锯齿比较疏,刀身比较厚,比较大,对于用在模型这种小零件不易拉锯~所以只能乖乖买模型锯啦~ 其实一把可用上好几年呢~ 如果哪位高手有买过好用的五金锯子麻烦介绍和分享心得给大家哦~
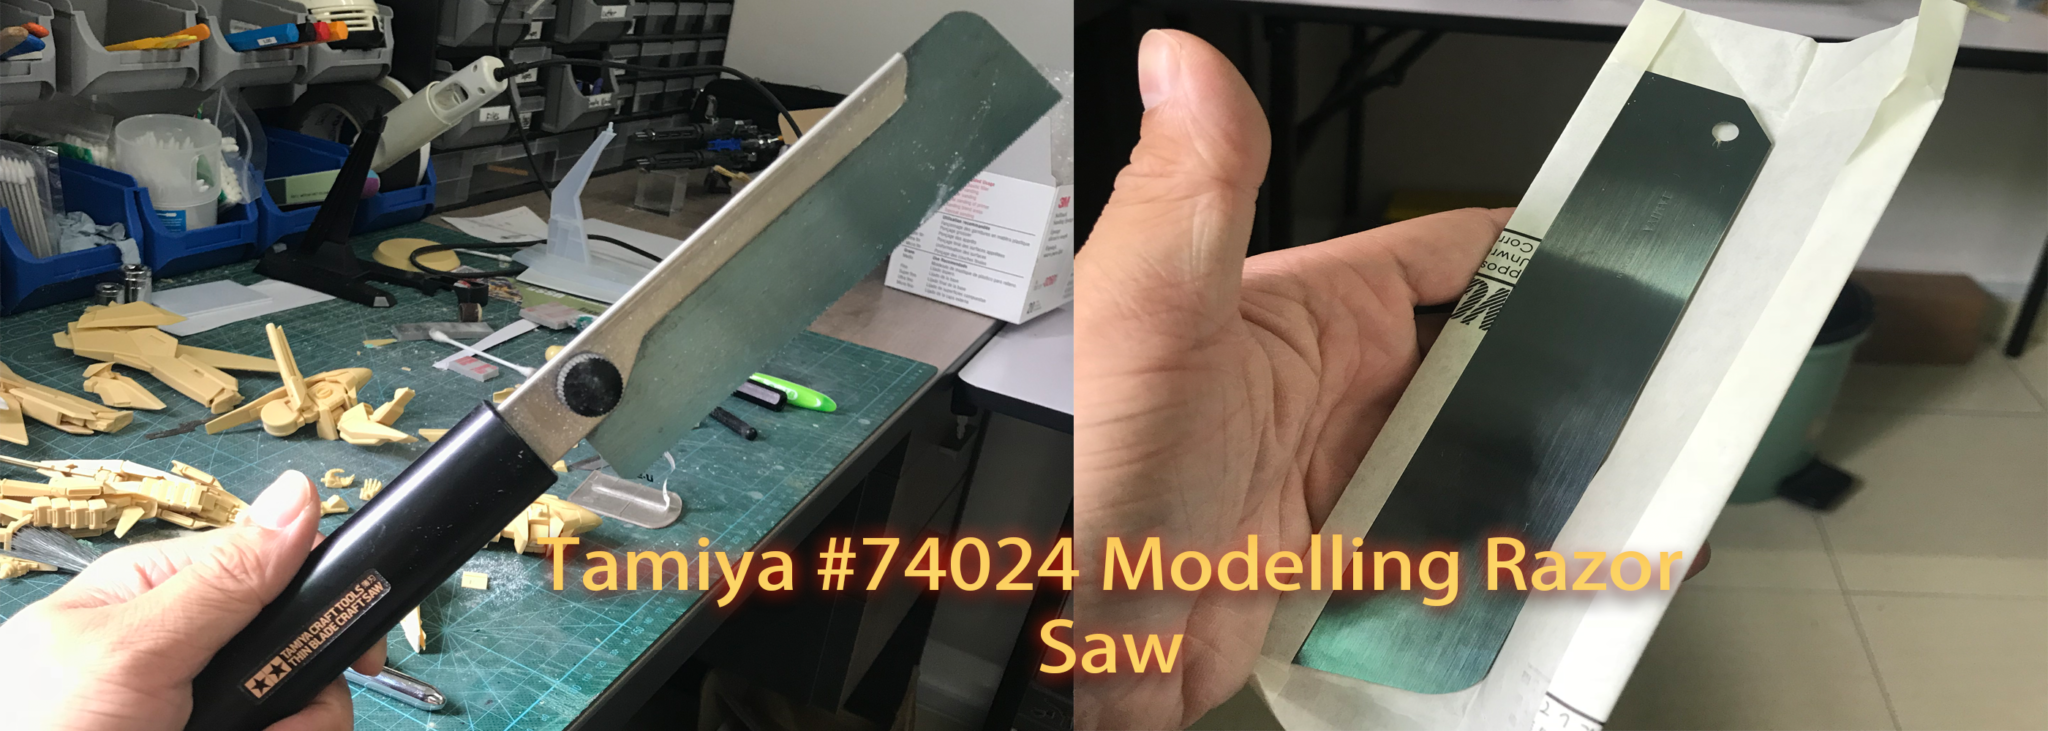
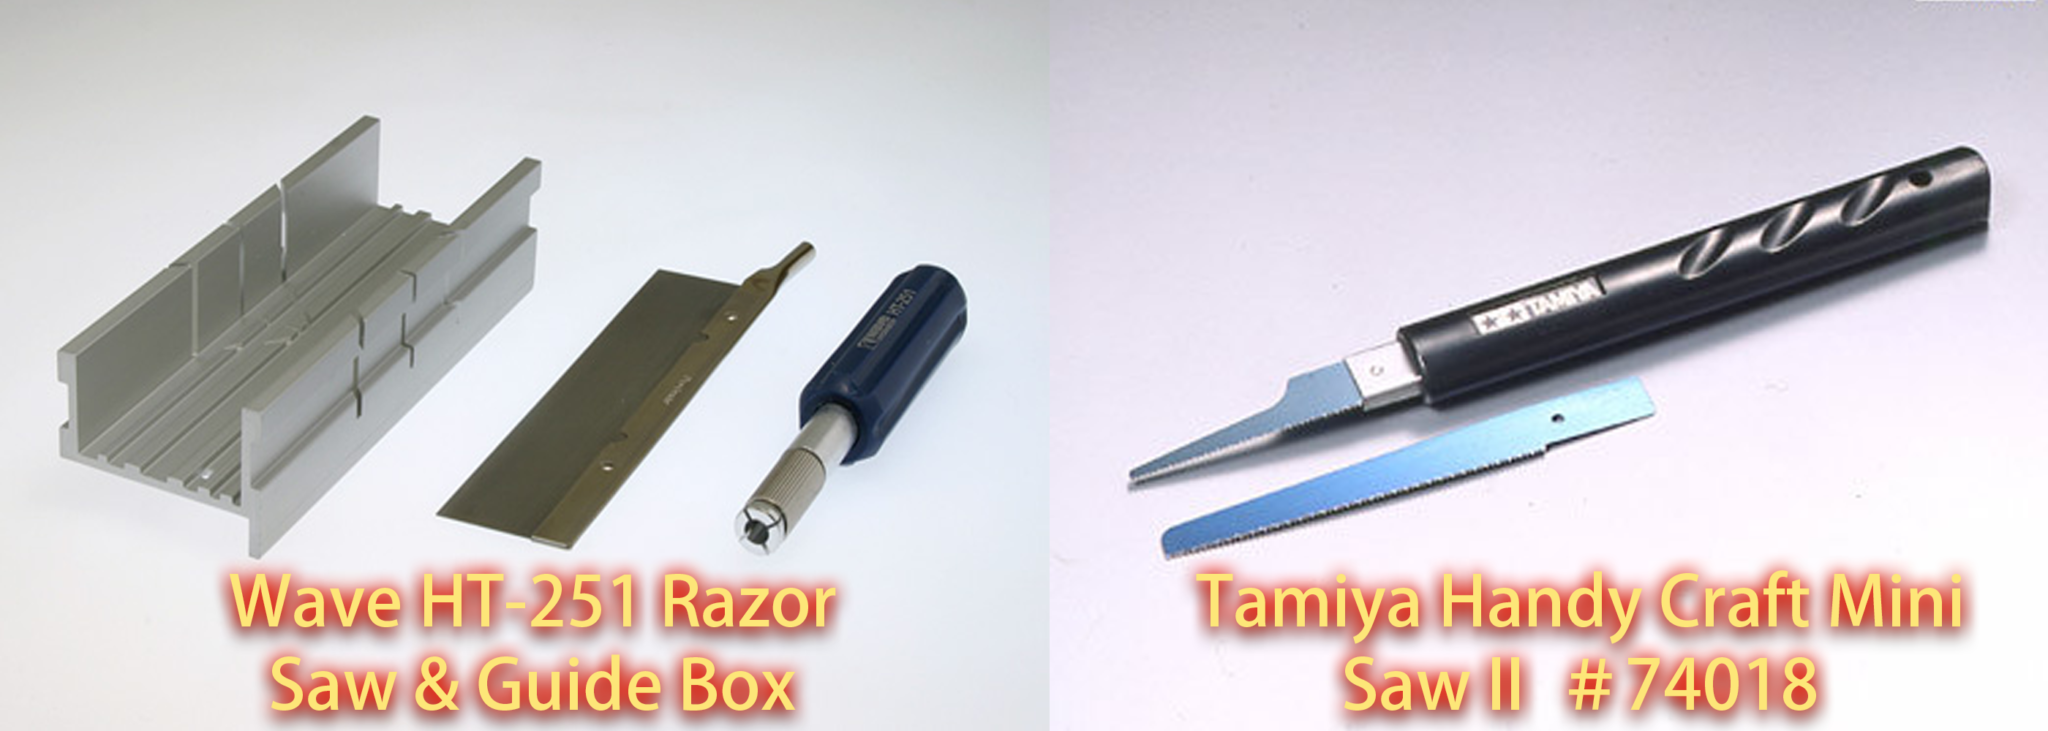
本人喜欢用的也是田宮牌不过却是大型锯子~ Tamiya #74024 Modelling Razor Saw!!别看它大型难以使用~其实用起来比你想象来得容易呢~ 切口也非常平整~ 如有余下的部位只需使用砂纸#180轻磨几下就好啦~重要的是它还有附送一把spare刀^^如果有什么锯類次田宮这款的话我想应该是Wave HT251吧~而Tamiya Handy Craft Mini Saw II #74018,ManWah, 优速达那种小型手锯貌似也是不错的选择~(虽然我本人还没用过)
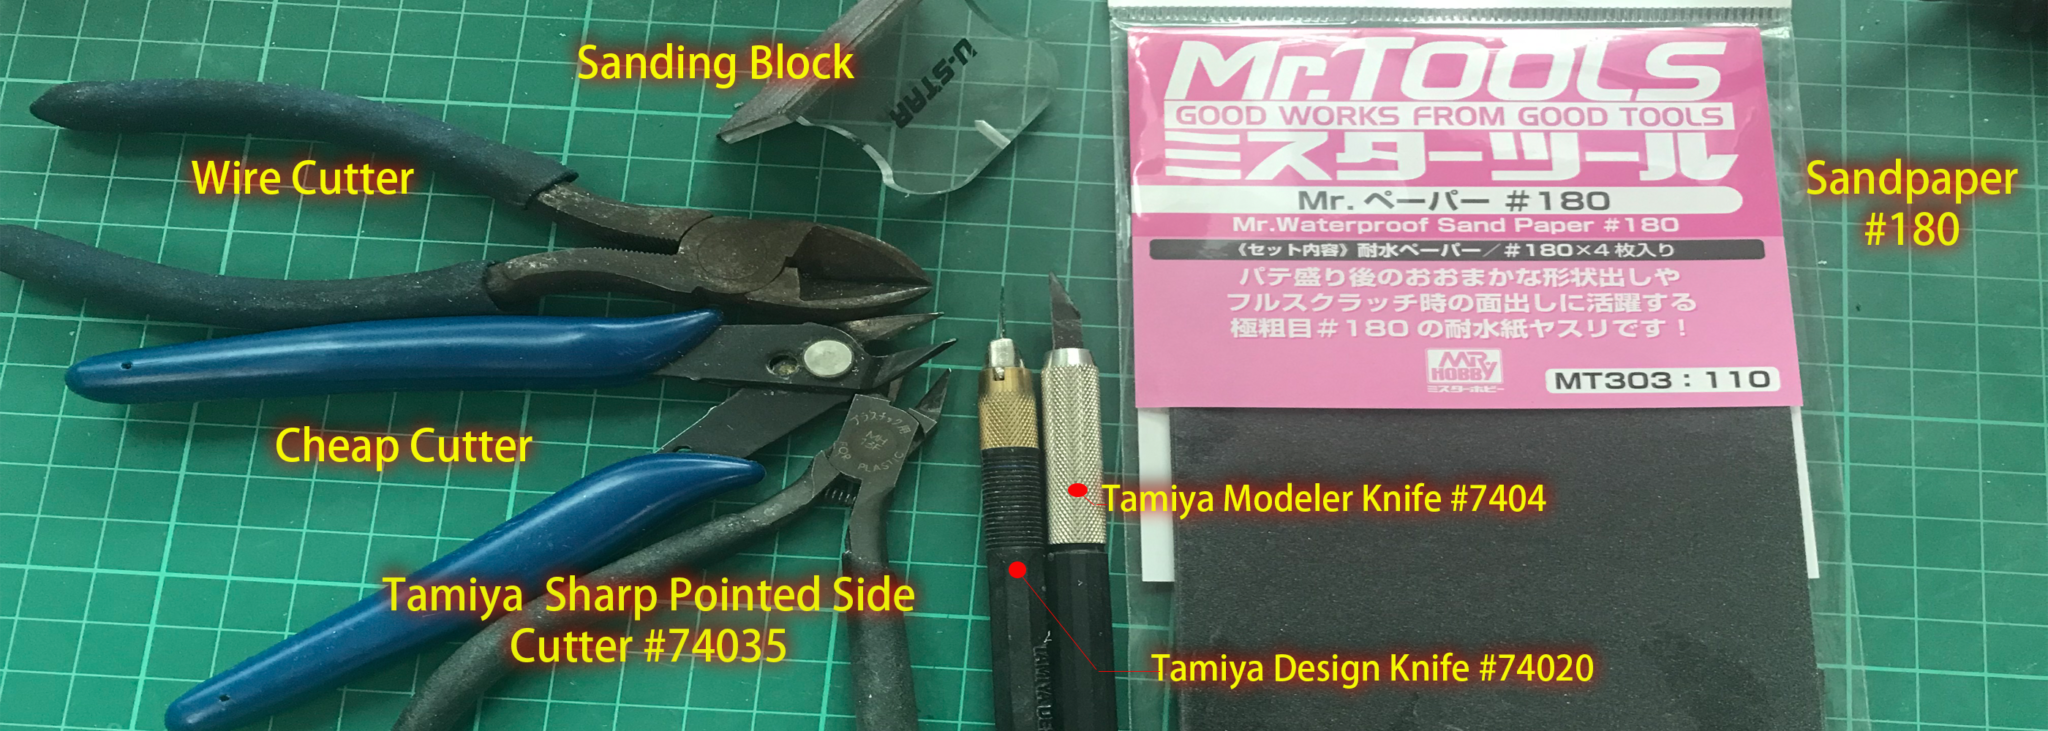
第二种:使用一般模型或者电线用的剪钳,笔刀和砂纸~就如塑料拼装模型做法一样~ 剪,切,打磨!!但由于水口比较大~所以千万别一刀解决,分几次处理~不然有机率剪烂零件~ 原因就是树脂材质比较坚硬~ 加上一般剪钳的锋利度是不可能剪断这么厚的水口,所以一定是用了一定的力气去剪断,由于压力的关系使零件某些地方破裂~ 到时你只能指望瞬间胶,“五爽大法”和补土了来补救了~
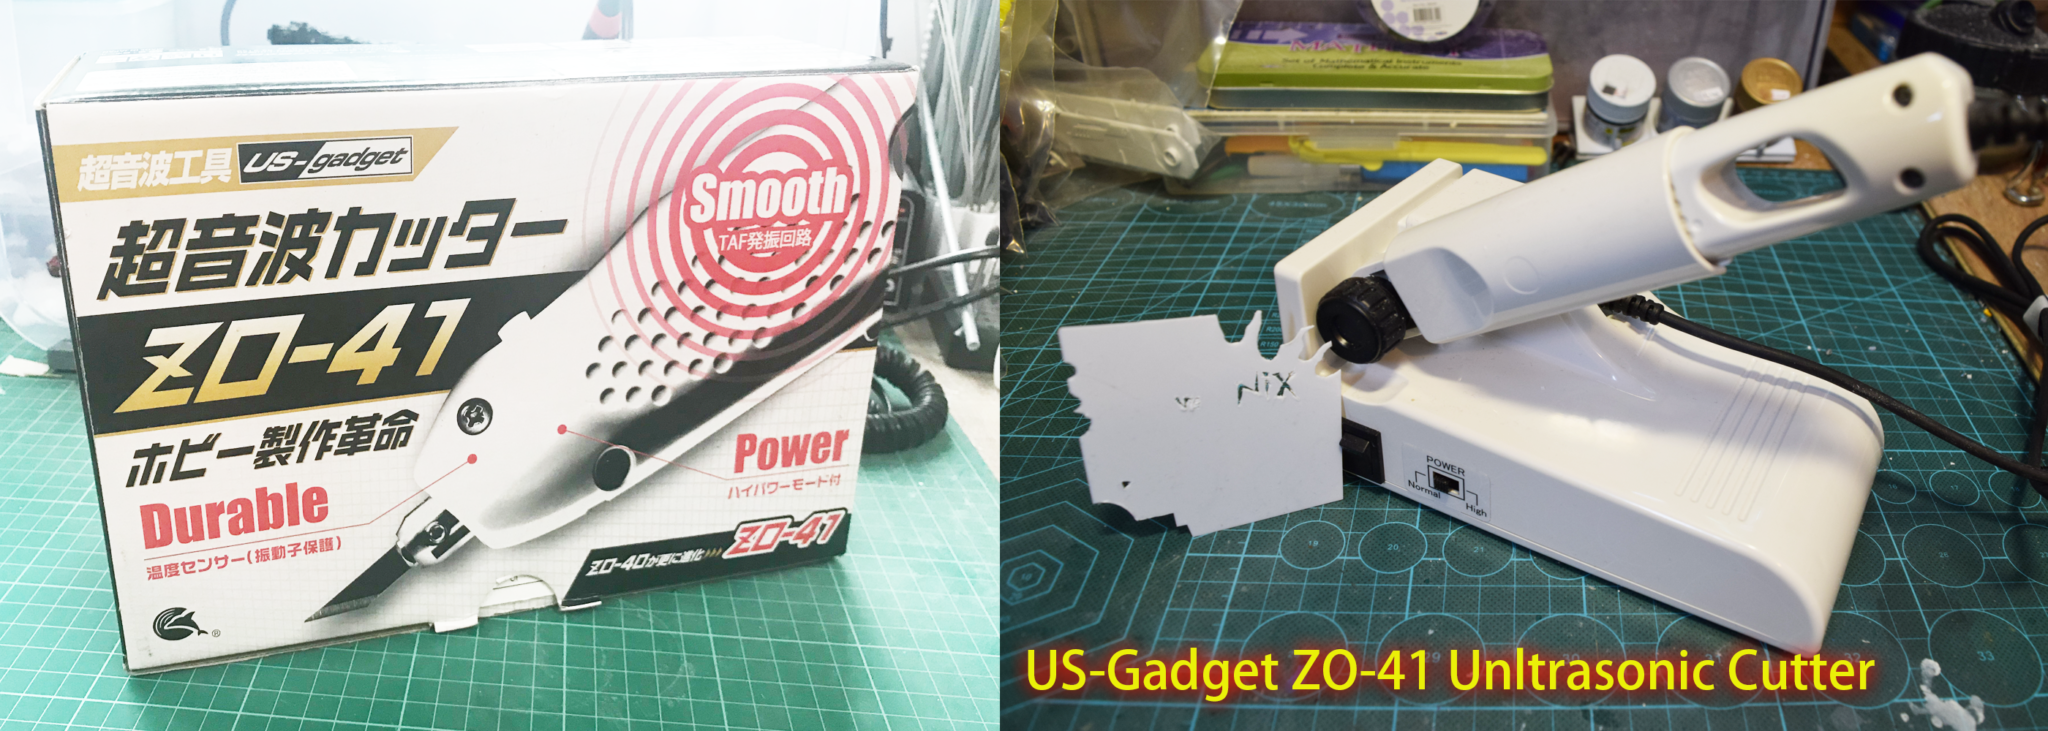
第三种:就是使用现代高科技产品~ [超音波刀]!! 切削树脂材质如同牛油~~每秒40,000震动!!
看到这类产品我问你怕未~!!!如硬要说他的不好~ 那就是太TMD贵了~ 什么都贵,机体本身就贵,连刀头,保养品全部都很贵~
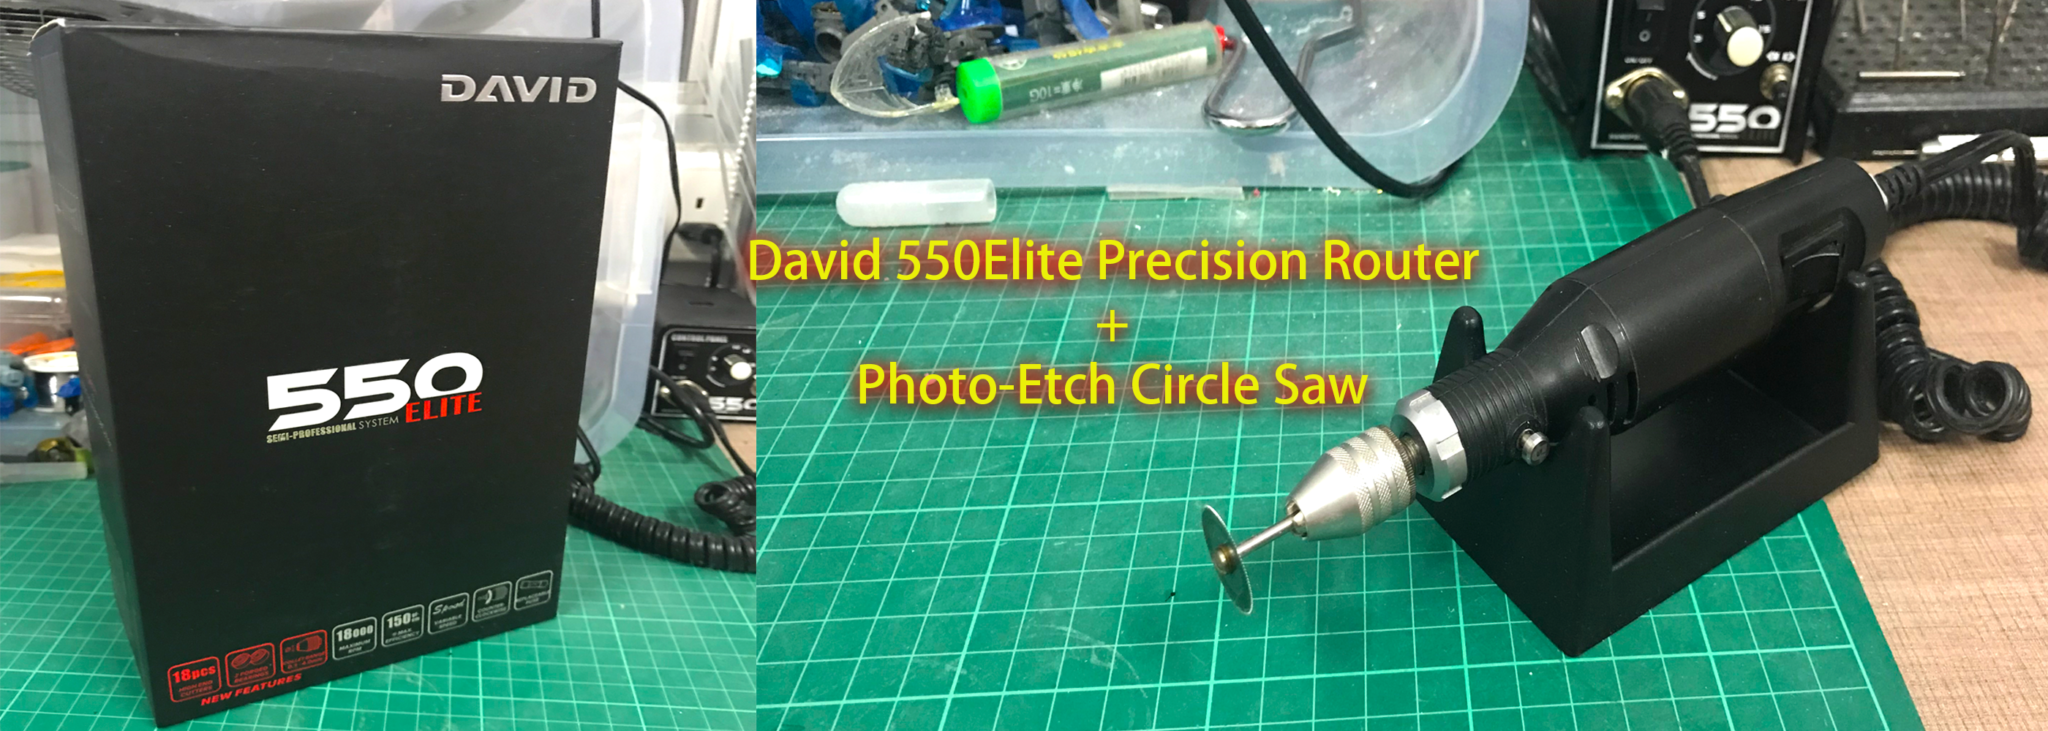
第四种:电转+蚀刻圆锯刀头~这方法虽然很快但也是我最不推荐的~ 原因太危险了~ 除非你已经使用电转来切割到了出神入化的地步~ 否则还是乖乖剪,切,打磨吧~
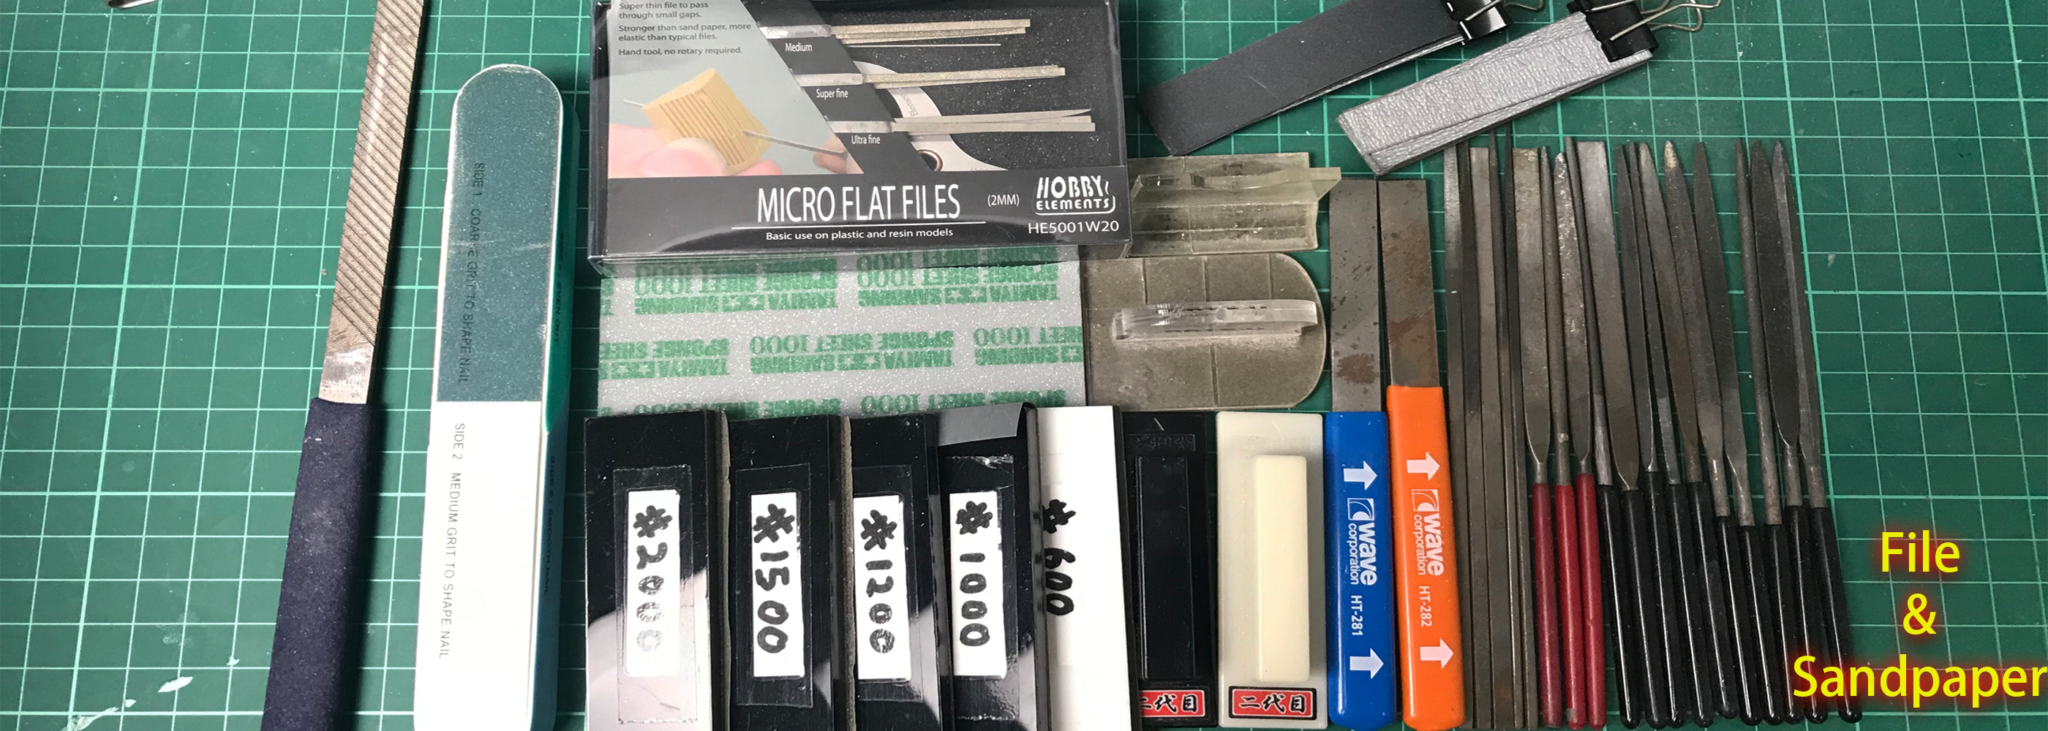
第五种: 这方法基本就多余的~ 就是使用砂纸或锉刀削掉水口~
我想没人会这样做吧~ 但也算是一种方法所以列下去了 !!o(><)o
幸苦大家了~ 恭喜你看完这篇文章
由于不想大家看太多文字~ 所以把文章分开几个部分来写~ 这样如有朋友某个地方不明白而回来這爬文章的时候容易寻找^^
希望小小的文章有助你们^^
What’s up ~ Everybody ~ I’m NiX ^^
Welcome to MuseigenHobby. And today I’m gonna show my new program is called
[iKnew iTalk] #01
This kind of post is not the tutorial~Just a place to sharing my own Experience and Opinion.
And I’m not good in English so I cannot fully translated Chinese into English .
So I will keep it simple !!!
Usually, My Resin progress would be:
Step 1 : Check the parts carefully and read the Term. If got any problem just contact customer service as soon as possible.
Step 2 : Remove nubmarks
Step 3 : Pin and Preassembled
Step 4 : Sanding and fill the hole or gap
Step 5 : Soaking and Washing the kits
Step 6 : Drain and Rinse the kits.
Step 7 : Apply Primer and Check the defective parts
Step 8 : Fix the problem and apply Primer again
Step 9 : Apply Color and Masking
Step 10 : Apply Decals, Panel line and Final clear or matt coat. (Done)
Let’s talk about STEP 1 . Please give Attention on this step because it will cost you few dollar if you are ignoring to count and check the parts carefully~ So everytime you got any resin kits please keep read the Term first.
Step 2 : How to remove nubmarks?
Basically, Resin Casting is very hard so you cannot cut the nubmarks as easy as Plastic Kits. So I have few option to do that. Depend what you have and choose the best way for you to cutting nubmark.
Option 1 : In my opinion, the best way to cutting nubmark is use Razor Saw. My recommendation is Tamiya Modelling Razor Saw #74024. It’s thin and sharp, easy to use, clean cut and very useful. Some of you guys thinking about it is too big for cutting resin kits but I can tell you It is more EASIER to use than you thought^^ If you can’t get this type of Saw you also can get another brand like WAVE HT-251 Razor Saw and Guide Box, U-Star Handy Craft Saw, ManWah Saw ~
Option 2 : Wire Cable Cutter or Model Cutter, Hobby Knife and Sandpaper. This method same as doing Plastic Kits progress, using cutter to cut the nubmarks carefully , and then use hobby knife or sandpaper to clean the surface. If cause any problem when you cutting you can use super glue and putty to fixing.
Option 3 : Using Ultrasonic Cutter to remove nubmarks. The ultrasonic cutter can easily cut Resin like BUTTER~ Extremely quicky, easy to use but very EXPENSIVE~ I mean that machine, accessories and maintaining tools .
Option 4 : Electric Drill Machine with Photo-Etch Circle Saw. I won’t recommend this option to newbie. It’s a little bit tricky to do that ~ So please don’t use this option if you aren’t using electric drill machine before.
Option 5 : Just using File or Sandpaper to remove nubmark. This is the hardest way so I won’t recommended ~ But if you don’t have any tools to use and this is the best option to you! Good Luck.
Congratulation!!!!!! You’re just finish reading this post^^ and thank you very much.
If you do like my post please share and stay tuned with me^^
Hope you have a nice day~








0 Comments